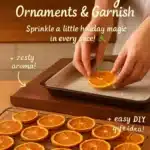
A cozy homemade idea for a rustic Christmas.
introduction
This simple project makes a warm and rustic decoration or small gift. It uses wood, twine, paint, and some basic tools. You can make several in one evening. If you want a meal idea to go with a cozy craft night, try this Creamy Sun Dried Tomato and Chicken Fettuccine for a full night in.
why make this recipe
You make this to give a homemade touch to your home or gifts. It looks natural and fits many styles. It uses cheap materials. Kids and adults can help. This style matches simple makers and small craft stories like the one in the Anna Wilson biography, which can give you more ideas.
how to make Pin by Stasik Baksic on Merry Christmas and Happy New Year in 2025 | Homemade Christmas, Homemade Christmas Gifts, Christmas Decorations Rustic
Follow the steps below to make one ornament or pin. Work on a flat surface and keep tools away from children.
Ingredients :
- Small wooden slice or craft wood disk (about 2–3 inches)
- Twine or thin jute string (12–18 inches)
- Acrylic paint (red, white, green, brown)
- Small paintbrush
- Sandpaper (fine grit)
- Hot glue or craft glue
- Optional: small pine cone, faux berries, tiny bell, or ribbon
- Varnish or clear spray (for protection)
Directions :
- Sand the wood slice lightly so the surface is smooth. Wipe off dust.
- Paint the front with a base color (white or light brown). Let it dry.
- Add simple designs: write "Merry Christmas" or paint a small tree or star. Keep strokes small and clear.
- Let paint dry fully. Add a second thin coat if needed.
- Attach twine: glue one end to the back top of the wood slice and tie a loop. Let glue set.
- Add decorations: use small drops of hot glue to attach a pine cone piece, faux berries, or a tiny bell.
- Finish with a light coat of varnish or clear spray to protect paint. Let dry.
how to serve Pin by Stasik Baksic on Merry Christmas and Happy New Year in 2025 | Homemade Christmas, Homemade Christmas Gifts, Christmas Decorations Rustic
Hang the ornament on a tree, wreath, or door knob. You can also tie it to a wrapped gift as a gift tag. Place a set of three on a small board to make a table centerpiece.
how to store Pin by Stasik Baksic on Merry Christmas and Happy New Year in 2025 | Homemade Christmas, Homemade Christmas Gifts, Christmas Decorations Rustic
Store in a dry box or plastic container. Wrap each piece in tissue paper so decorations do not rub off. If you plan to gift or sell many, check any local rules or shipping notes in the terms and conditions before you send items.
tips to make Pin by Stasik Baksic on Merry Christmas and Happy New Year in 2025 | Homemade Christmas, Homemade Christmas Gifts, Christmas Decorations Rustic
- Use thin layers of paint to avoid drips.
- Let each coat dry fully before adding details.
- If you do not have varnish, use a clear nail polish spot on the edges.
- Work in a well-ventilated area when you use glue or spray.
- Make a few at once to save time and use leftover paint.
variation (if any)
- Use small fabric scraps and glue them on for a soft look.
- Make a set with matching colors: all whites and greens for a simple palette.
- Turn the wood slice into a magnet by adding a small magnet on the back.
- Swap twine for a ribbon to make it more festive.
FAQs
Q: How long does it take to make one piece?
A: It takes about 20–40 minutes, depending on drying time.
Q: Can I use paper instead of wood?
A: Yes. Thick cardboard works well for a lighter and cheaper option.
Q: Is hot glue safe for kids?
A: Use hot glue only with adult supervision. For children, use craft glue instead.
Q: Can I wash these ornaments?
A: No. Avoid water. The paint and decorations can wear off if wet.
Rustic Christmas Ornament
Ingredients
- 1 piece Small wooden slice or craft wood disk (about 2–3 inches)
- 1 length Twine or thin jute string (12–18 inches)
- 1 set Acrylic paint (red, white, green, brown)
- 1 piece Small paintbrush
- 1 sheet Sandpaper (fine grit)
- 1 tube Hot glue or craft glue Hot glue should be used with adult supervision
- 1 optional Small pine cone, faux berries, tiny bell, or ribbon Optional decorative elements
- 1 coat Varnish or clear spray (for protection)
Method
- Sand the wood slice lightly so the surface is smooth. Wipe off dust.
- Paint the front with a base color (white or light brown). Let it dry.
- Add simple designs: write 'Merry Christmas' or paint a small tree or star. Keep strokes small and clear.
- Let paint dry fully. Add a second thin coat if needed.
- Attach twine: glue one end to the back top of the wood slice and tie a loop. Let glue set.
- Add decorations: use small drops of hot glue to attach a pine cone piece, faux berries, or a tiny bell.
- Finish with a light coat of varnish or clear spray to protect paint. Let dry.